
The Panoplia.org Soft Skills and Tactics (SST) course includes a five-topic lesson called “Loadout Levels.” Some refer to this wider concept as “Lines of Gear.” We make the following statement in the introduction to this lesson:
As much fun as it is to keep up on the latest tactical gear and to acquire the best you can afford, we’d encourage you to carefully consider every purchase. Resist the temptation to buy what’s “in” among those who want to be seen by others as serious tactical operators. Instead, let every piece of gear, equipment, and every supply have a set purpose in your overall loadout levels philosophy. Above all, know your gear and equipment. Know what it is, where it is, how it works, and when it needs to be deployed and for what purpose. The loadout levels concept is not about acquiring gear. It’s about having what you need, when you need it, and knowing how to get your hands on it within seconds. An understanding of the overall loadout levels concept will dramatically enhance your ability to thrive in any situation.
Philosophy and concept are two key terms mentioned in the paragraph above. We’ve broken the overall Loadout Levels concept into five sections. Each of the Loadout Level sections in the SST course has a reference card that’s explained in detail within the course. We’ve combined the various reference cards into an eight-page, high-resolution PDF document that you can access here. Click on the image below to download it.
As you carefully review this PDF document, you’ll understand that the LL-3B bag has a very specific place in the overall Loadout Levels Concept. It can, to some degree, serve as a stand-alone item, yet in the overall concept it’s intended to extend your LL-3A bag from lasting 21 days to lasting almost two months. Please refer to the SST course Topic 01.02.04 for more information.
We recently updated some of the contents in our LL-3B bag, and so thought this might be a good opportunity to review it in this article.
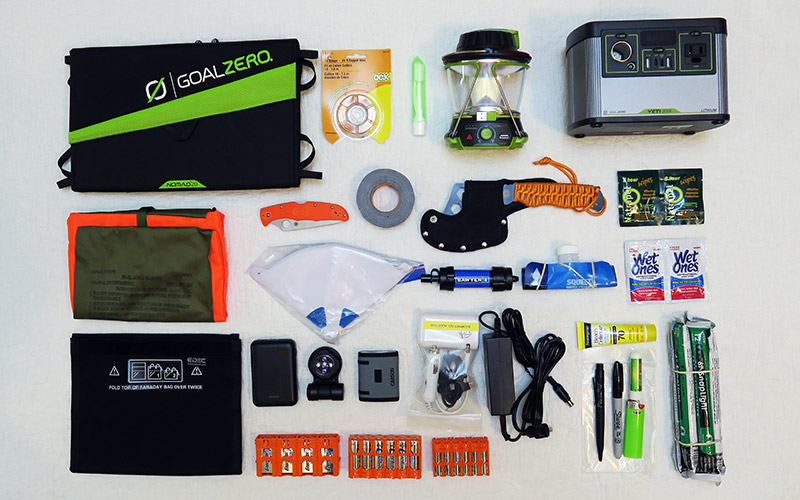
The image below shows almost the entire contents of the LL-3B bag that rides in our vehicle. I say “almost,” because I forgot to include a few things that are tucked into side pockets in this overall shot. They’ll be shown later in this article.
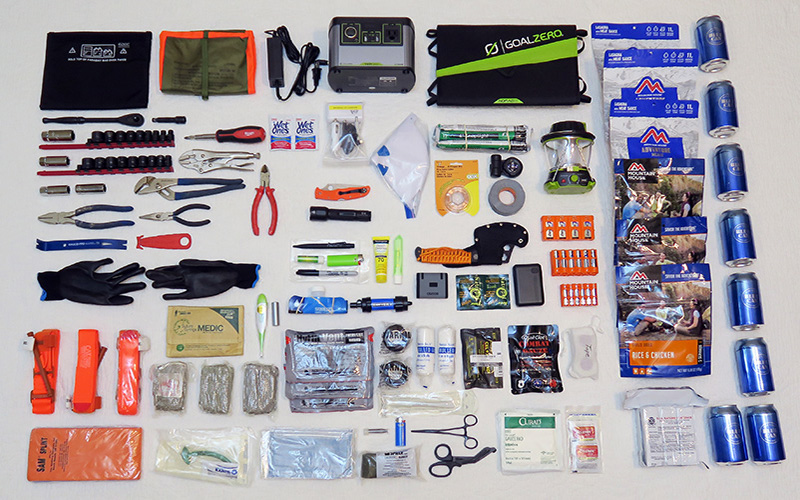
There are well over 100 items shown. The most recent update is the Goal Zero power station shown in the top-middle of the image. We replaced our Yeti 400 Lithium with the new Yeti 200X. Although this does not offer quite as much in terms of recharging power for communications devices, we think it’s adequate, and it saves 11 pounds over the previous unit. It also takes up considerably less space. The Goal Zero Nomad 20 Solar Panel shown next to it can be used to recharge the unit.
We noted in the paragraph quoted above that you need to, “Know your gear and equipment. Know what it is, where it is, how it works, and when it needs to be deployed and for what purpose. The loadout levels concept is not about acquiring gear. It’s about having what you need, when you need it, and knowing how to get your hands on it within seconds.”
The last sentence is the tricky part for many people. Having exactly what you need when you need it is one thing, yet not everyone can lay his or her hands on a particular piece of gear within seconds. To do so takes planning an organization. We describe below what’s worked well for us for a number of years.
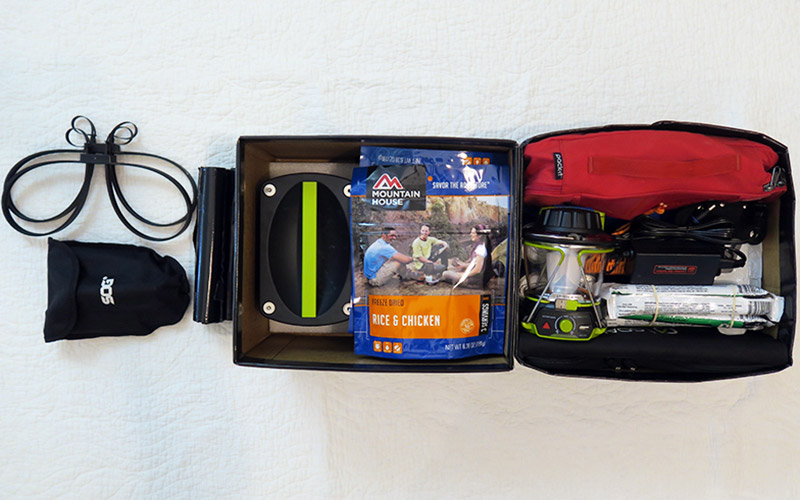
We noted above that an LL-3B is intended to supplement an LL-3A bag. Our LL-3A has a decent trauma kit, yet the image below shows how we have expanded this for the 3B Level.
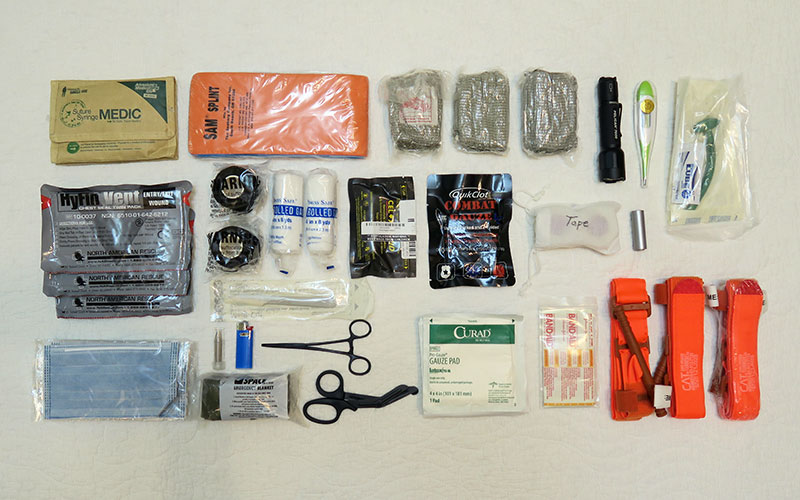
New to this is the Celox Rapid Ribbon shown in the middle of the image above. We’re testing this to see if it lasts as long at the QuickClot Combat Gauze in the harsh temperatures of a vehicle’s interior. In order to be able to access the items shown above quickly, we’ve set them up in a certain way within the trauma bag shown below.
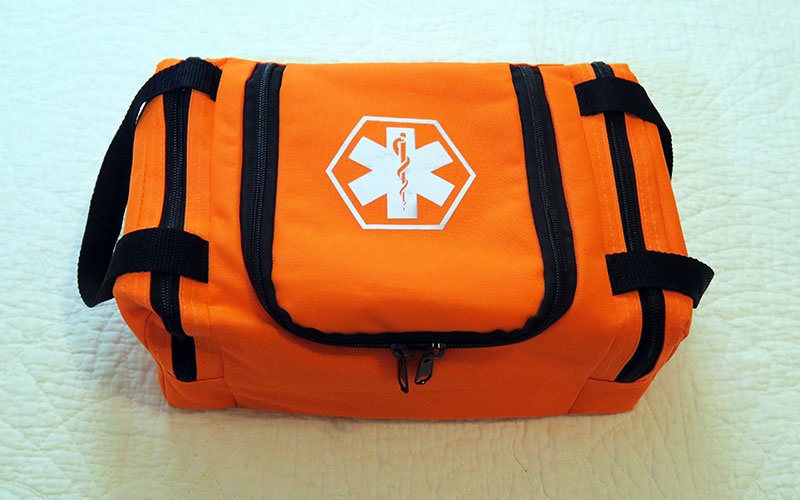
The center section is set up so that anyone who accesses it can plainly see what’s there. Resist the temptation to over-stock your trauma kit. Doing so makes finding what you need in an emergency more difficult. The two outside pockets are labeled. The one on the right holds chest seals and pressure bandages. The one on the left holds three tourniquets.
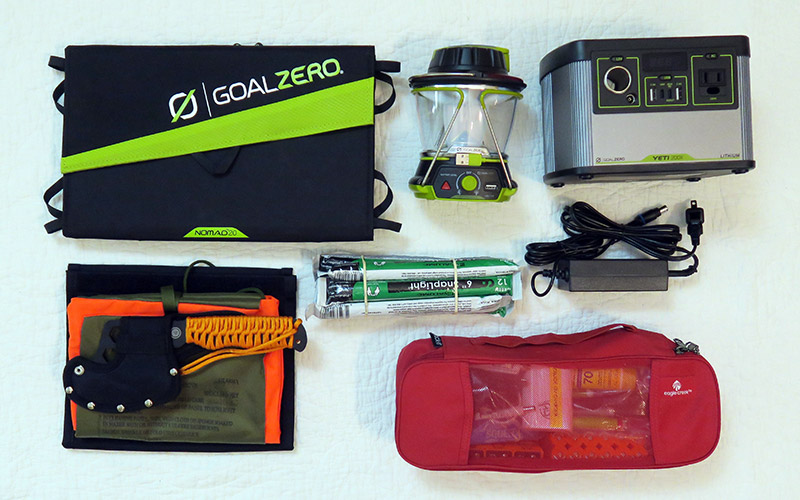
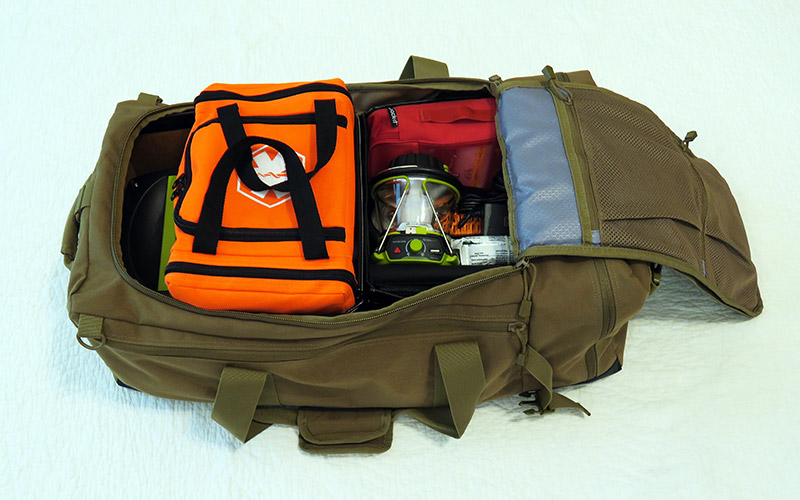
Electronic support and a few survival items are shown in the image below. Again, these simply supplement the items in our LL-3A. The less-obvious items include a VS-17 signal panel (mid-left), a Faraday bag (Lower-Left), and a night vision monocular (gray item above the batteries). Next to this is a unit that allows one to recharge a MacBook Pro using a 12 Volt DC lighter socket. Finally, the triangular white items are paint strainers. These are useful to pre-filter a water supply that has heavy sediment.
The items above are organized as shown below. This allows for thirty or so separate items to be consolidated into just nine. The red pouch lets us know that electronic items are stored there.
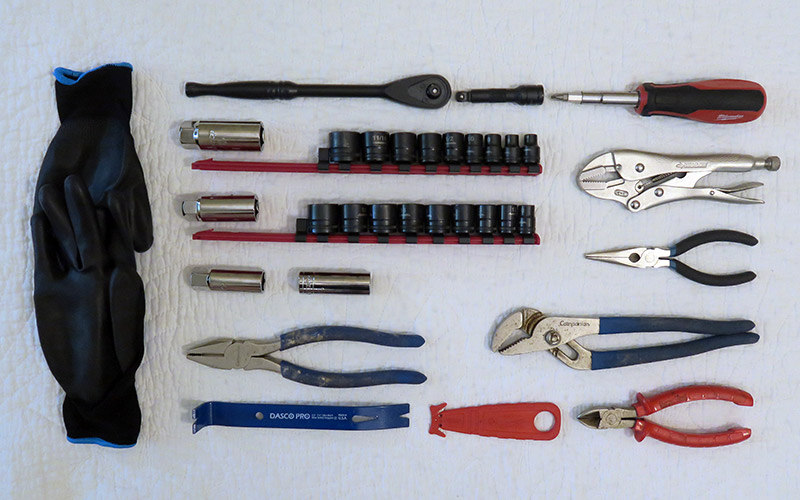
The image that follows shows the tools included in our LL-3B. We’ve had some of these for many years, and they’ve proven invaluable at times.
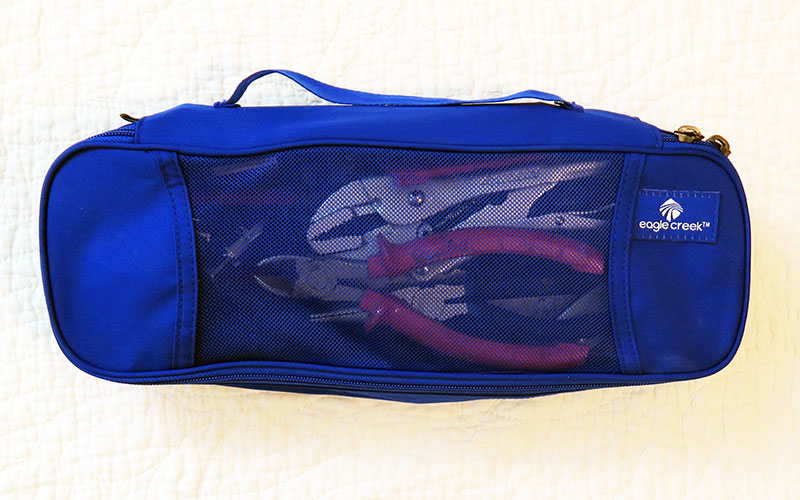
All the tools shown above fit neatly into one pouch as shown below. In our scheme, a blue pouch denotes tools.
The following image shows that we place all the items shown in the “overall image” at the top of this page, including the emergency food and water supply that was not shown separately, into two boxes that have been reinforced with duct-tape. This helps ensure that items stay in place rather than shift around in our bag during transport. Also shown are the shovel, zip cuffs, and heavy-duty trash bags that are kept in side pockets of our LL-3B bag.
We’ve chosen to use a Condor Colossus Duffle Bag for our LL-3B. This sturdy and affordable bag has stood the test of time, and if absolutely necessary can be carried on one’s back with the backpack straps that are hidden in the lid.
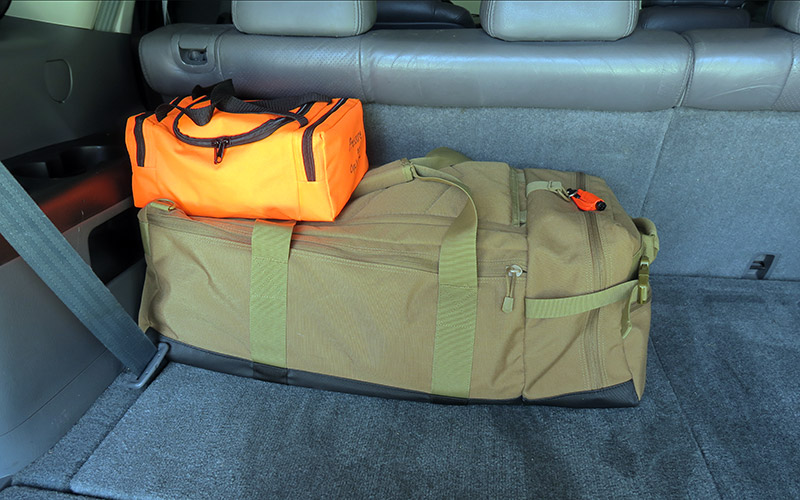
The image below shows how our LL-3B bag sits within our vehicle. Although the trauma bag fits within the duffle, we choose to keep it on top for easy access as shown. The entire LL-3B bag weighs in at 46.7 pounds, including everything shown in this article.
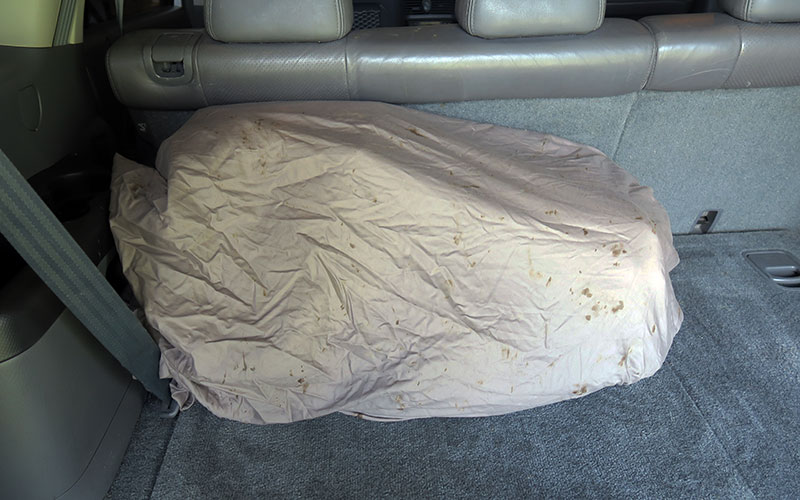
Finally, even if you have tinted windows like we do, it’s a good idea to cover your Loadout Level 3B bag when it’s in your vehicle. Compare the image above to the one below to see how this makes the bag less appealing to anyone who might catch a glimpse of it.
That about covers our LL-3B as we have it set up now. Remember that this is not really set up to be a stand-alone unit, but rather to extend the life of one’s LL-3A bag by another 30 days or so as noted in the course. Feel free to comment below on items that you might suggest we include in further LL-3B updates.
1 Comment
Trackbacks/Pingbacks